Table of Contents
ToggleSetting up a home theater can transform how your household experiences movies, sports, and gaming. But if you’ve ever tried running cables behind walls or calibrating surround sound speakers, you know the gap between “looks simple” and “actually works right” can be brutal. Whether you’re building from scratch or upgrading your existing setup, home theater installation services handle the technical complexity so you don’t have to waste a weekend troubleshooting audio sync issues or damaging your walls. This guide walks you through what these services cover, how to plan your space, and what to expect when professionals step in to handle the heavy lifting.
Key Takeaways
- Home theater installation services handle cable management, acoustic calibration, and equipment placement to deliver cinema-quality sound and picture without costly DIY mistakes.
- Proper speaker positioning—front channels at ear level, surrounds on side walls, and rear speakers 1–2 feet above ear level—creates an enveloping soundscape that transforms your viewing experience.
- Professional installation typically costs $1,500–$5,000+ but prevents damage to property and guarantees warranty protection, making it worth the investment for wall-mounted cables and complex room geometry.
- Verify installer credentials, request multiple quotes, clarify warranty terms, and confirm whether permits and acoustic treatment are included before hiring a professional.
- Video quality standards require 4K resolution with HDMI 2.1 cables, HDR color calibration, and proper lip-sync timing, all requiring professional setup to optimize for your specific room.
What Home Theater Installation Services Include
Home theater installation isn’t just plugging in equipment and calling it done. Professional installers handle several key tasks that separate a functional system from one that actually delivers cinema-quality sound and picture.
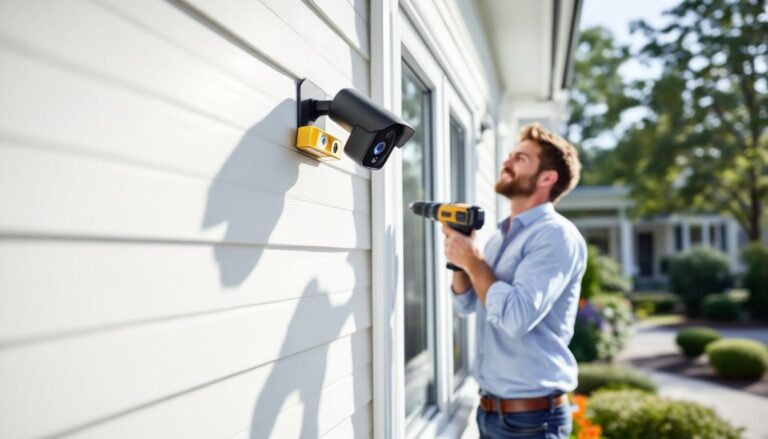
Equipment mounting and placement forms the foundation. Technicians determine optimal speaker positioning, front left, front right, center channel, surrounds, and rear speakers all need precise placement to create an enveloping soundscape. They mount flat-screen TVs at the correct height and viewing angle, usually 15–30 degrees below eye level when seated. Receiver cabinets, media players, and amplifiers get secured in entertainment centers or wall-mounted racks with proper ventilation to prevent overheating.
Cable management and concealment often consumes as much effort as equipment setup. Running HDMI, speaker wire, power cables, and network lines through walls, conduit, or raceways requires knowledge of building layout and local electrical codes. Installers identify stud locations using wall scanners, drill appropriate holes at angles to avoid damage, and use in-wall rated cabling that meets fire codes. This is where a careless DIYer can accidentally drill through plumbing or electrical, so professional judgment matters.
Acoustic treatment and calibration transforms raw speaker sound into balanced audio. This may include adding absorption panels to reduce echo, bass traps to control low-frequency buildup, and using calibration microphones to adjust levels and delay timing so all speakers reach your listening position at the same time. Many installers run Audyssey, MCACC, or Dirac Live, automated calibration systems built into quality receivers, to fine-tune the system.
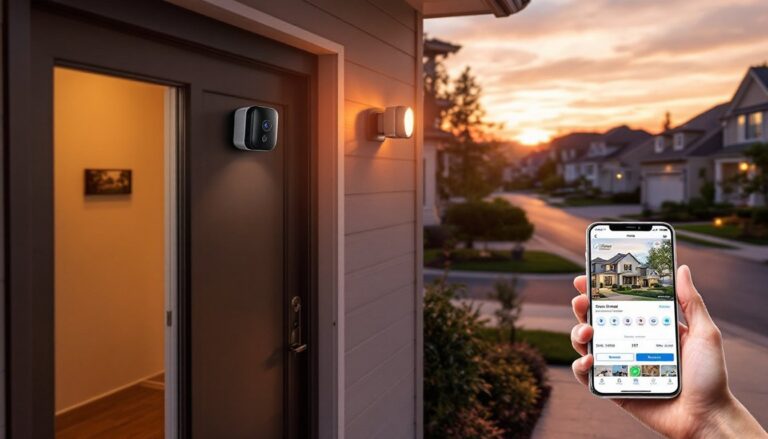
Wiring and connectivity covers integration of all sources: cable boxes, streaming devices, gaming consoles, and Blu-ray players. Installers configure HDMI switching, set up network connectivity for smart TVs and streaming apps, and program universal remotes or smart home controls so you’re not juggling five different remotes. Some services include basic instruction on operation and troubleshooting.
Planning Your Home Theater Layout and Design
Before a single cable runs, plan the room layout. Successful home theater design starts with honest assessment of your space: dimensions, windows, doors, and how you’ll actually use the room.
Measure twice, plan once. Document ceiling height, wall length, and identify structural elements like support columns, HVAC returns, or recessed lighting that affect speaker placement. Note window locations and their light-control capability: reflective surfaces and hard walls amplify sound reflections and create acoustic problems. A dedicated home theater in a basement offers better acoustic isolation than a family room that doubles as a theater on weekends.
Seating arrangement drives everything else. Standard theater layout positions your main viewing area 1.5 to 2.5 times the screen width away from the display. If your screen is 65 inches wide, sit 8–13 feet back. This distance provides immersive surround sound without making voices sound unnatural. Mark your primary seating position: this is where your center channel speaker should aim, where surround speakers flank viewers, and where rear speakers sit 1–2 feet above ear level.
Speaker placement zones follow predictable geometry. Front three speakers (left, center, right) live at or below ear level, the center channel directly behind or above the screen, side channels 22.5 degrees off-axis. Surrounds mount on side walls at ear level or slightly higher. Rear surrounds or height speakers go overhead or in top corners if you’re running object-based audio like Dolby Atmos. Subwoofers work best in room corners where bass modes reinforce, though some rooms need multiple subs or boundary shaking to avoid boomy bass in one seat and weak bass in another.
Aesthetic and practical routing considers cable pathways. Run speaker wire through wall cavities during construction, or use surface raceways if walls are already finished. Power outlets need placement near AV racks: consider adding dedicated circuits to avoid sharing power with heavy appliances that cause hum. Cable conduit also protects wiring from the occasional drywall anchor or furniture leg.
Professional installers use design software or physical mockups to visualize speaker and seating placement before any mounting hardware goes in. This prevents costly repositioning later.
Choosing Between Professional Installation and DIY
The DIY versus hire question depends on your comfort with technical systems, time availability, and what mistakes might cost you.
DIY works best when: You’re adding a simple soundbar or upgrading a receiver in an already-wired room, you enjoy troubleshooting and have patience for research, your room layout is straightforward without complex ceiling height or structural obstacles, and you’re comfortable voiding warranties if installation errors occur. YouTube and manufacturer guides cover basic setups well enough if you read carefully and measure twice.
Professional installation makes sense when: You’re running cables through walls (requires knowledge of building codes and safe drilling practices), you want room acoustic treatment designed for your space, you’re implementing object-based audio like Dolby Atmos or immersive sound formats, your room has difficult geometry like vaulted ceilings or irregular wall shapes, or you value warranty protection and ongoing support. A pro finishes in one day what a careful DIYer might stretch over weeks.
Cost-benefit analysis: Professional installation typically runs $1,500–$5,000+ depending on room complexity and equipment quantity, but labor prevents damage to property and guarantees proper setup. One misdrilled stud through an electrical wire, or improperly secured shelf dropping a $2,000 receiver, erases most labor cost savings. Services like A Team Home Services handle coordinated installation, saving you from learning building code compliance and cable management best practices on your first project.
Most experienced installers bundle labor into equipment package pricing or charge hourly rates ($75–$150/hour is typical, varying by region and complexity). Ask upfront whether consultation, design mockup, and follow-up calibration are included.
Key Considerations Before Hiring a Professional
Not all installation companies are equal. Vetting ensures you get skilled technicians who understand both your equipment and local building requirements.
Check credentials and licensing. Licensed electricians are legally required for in-wall power work in many jurisdictions. Ask whether installers hold NFPA (National Fire Protection Association) certifications or manufacturer training badges from Denon, Yamaha, Onkyo, or other major AV brands. Word-of-mouth referrals and verified online reviews matter, look for detailed feedback about professionalism, cable management quality, and follow-up support.
Verify warranty and service terms. Get written documentation of what labor is covered for how long. If a connection fails three months later, is the fix free or does a service call cost extra? What happens if damage occurs during installation, is it covered by their insurance? Request references of recent jobs similar in scope to yours.
Get multiple quotes. Contact HomeAdvisor or ImproveNet to gather competitive bids. Quotes should itemize labor, materials, disposal, and any subcontractor fees. The cheapest bid often means corners cut on cable management or calibration. The most expensive doesn’t always deliver better quality, focus on detailed scope of work and included services.
Discuss permitting. Wall penetration, electrical work, and structural modifications in some areas require permits and inspections. A reputable installer will tell you upfront if permits apply and handle paperwork, though permits add 1–2 weeks to timelines and typically cost $200–$500. Skipping permits can create liability if someone’s injured or fire damage occurs.
Audio-visual pricing varies wildly by market, room size, and equipment quality. Research current installation costs in your area to establish realistic budgets. Northern California, New York, and major metros run 20–40% higher than rural regions due to labor rates and material availability.
Audio and Video Quality Standards to Expect
Understanding baseline audio and video performance helps you know whether your installed system is actually optimized.
Video standards center on resolution, refresh rate, and color accuracy. A 4K (2160p) display paired with HDMI 2.1 cables supports 60Hz or 120Hz frame rates for smooth motion in sports and gaming. HDR (High Dynamic Range) displays require compatible source content and properly calibrated color: this is where professional setup differs from basic plug-and-play. A good installer confirms your display supports and is configured for HDR, and that source devices output appropriate formats. Color temperature should measure around 6500K (neutral white): installers use calibration tools to dial this in.
Audio quality depends on room acoustics and speaker performance. Frequency response should span 20Hz (deep bass) to 20kHz (treble detail) without significant peaks or dips. This requires both quality speakers and acoustic treatment. Dolby Atmos or DTS:X immersive audio require ceiling speakers or height channels: standard 5.1 or 7.1 surround sound sits at ear level and doesn’t include overhead effects. A calibrated system maintains ±3dB level consistency across all channels, this requires a calibration microphone and sound meter, not guessing by ear.
Lip-sync (video-audio timing) should be imperceptible: lips move and sound comes simultaneously. Receivers delay audio to match video transmission through processing chains, installers set this offset during calibration. If it’s off by 50ms or more, dialogue sounds dubbed and distracting.
Testing and verification wrap up professional installation. Installers run test tones, check surround panning (sound moving smoothly across speakers), verify bass integration (subwoofer blending seamlessly with main speakers), and confirm all HDMI inputs recognize 4K and HDR signals. Request a written setup report documenting speaker distances, delay times, level adjustments, and calibration results. This documentation proves the system was professionally optimized if issues arise later.
Conclusion
Home theater installation services handle the technical complexity and building code compliance that separate casual movie-watching from immersive home cinema. Whether you choose professional installation or DIY depends on your room layout complexity, technical comfort, and time budget. Planning your layout carefully, vetting qualified installers, and understanding audio-video performance standards ensures your system delivers for years to come. Start by measuring your room, gathering quotes, and clarifying what services include, then enjoy the hundreds of movies ahead.