Table of Contents
ToggleA home security system used to mean calling a professional installer and signing a three-year contract. Today, homeowners can set up wireless security cameras in an afternoon with nothing but a smartphone and basic tools. Whether you’re protecting the front door from package thieves, monitoring a garage for break-ins, or keeping an eye on kids and pets indoors, wireless cameras have become affordable and genuinely effective. The challenge isn’t finding a camera anymore, it’s knowing which one fits your space, how to place it for real coverage, and how to keep the whole system secure from hackers. This guide walks you through every step, from selection to installation to network protection, so you can actually sleep easier knowing your home is being watched by the right devices.
Key Takeaways
- Wireless security cameras eliminate professional installation requirements and allow homeowners to set up comprehensive protection in an afternoon with just a smartphone and basic tools.
- Choosing the right home wireless security camera depends on three factors: location (indoor vs. outdoor), resolution requirements, and whether you prioritize deterrence, evidence capture, or peace of mind.
- Strategic camera placement at 7-9 feet high, angled downward, and positioned to avoid glare and direct sunlight maximizes coverage and prevents tampering while maintaining clear identification of faces and vehicles.
- Network security is as critical as physical installation—change default passwords to 16+ characters, disable unused cloud features, update firmware monthly, and use WPA3 encryption to prevent hackers from accessing your system.
- Regular maintenance including monthly lens cleaning, weekly motion-clip reviews, and WiFi signal monitoring ensures consistent performance and prevents false alerts from pets or seasonal changes.
- A layered security approach combining wireless cameras with quality locks, exterior lighting, and solid door frames provides the strongest home protection system.
Why Wireless Security Cameras Are Essential for Modern Home Protection
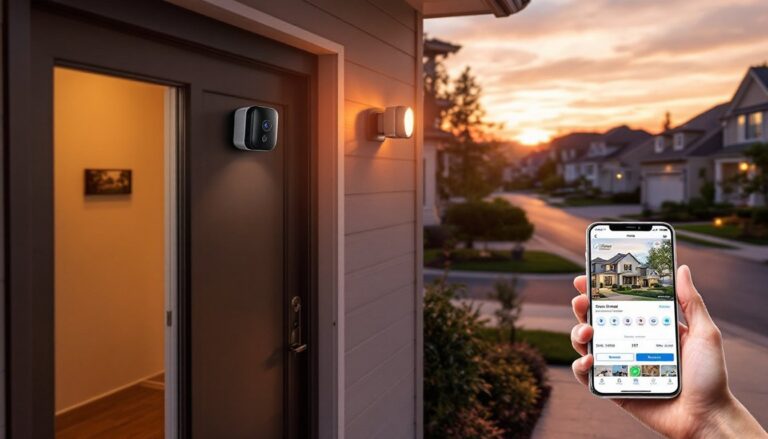
Wireless security cameras have shifted from luxury to necessity in most neighborhoods. Unlike wired systems that require running cables through walls, often meaning drywall repair and possible permits, wireless models install on a shelf, mount to a wall with two screws, and connect to your WiFi. You get video recorded to the cloud, instant phone alerts when motion is detected, and the ability to check in from work or vacation.
The practical advantage is threefold: you avoid installation headaches, you gain flexibility (move a camera between rooms if needed), and you sidestep recurring professional monitoring fees. A wireless camera watching your driveway can catch a package thief in action or provide evidence after a break-in. Indoor cameras deter burglars and help you monitor contractors or check on aging parents. Many homeowners pair them with services like Brinks Home Security for integrated alarm systems, but standalone cameras work just fine for those who want simplicity.
One honest truth: wireless doesn’t mean zero maintenance. You’ll still need to check WiFi signal strength, update firmware, and occasionally reposition cameras as shadows or seasonal changes affect views. But compared to the alternative, living with dead spots in your security coverage, the trade-off is worth it.
Choosing the Right Camera for Your Home’s Layout and Needs
Not all wireless cameras are created equal. Before you buy, ask yourself three questions: Where will this camera live (indoors or outdoors)? How much detail do you need (does 1080p suffice, or do you want 4K)? And what’s your priority, deterrent value, evidence capture, or just peace of mind?
Budget matters, but it’s not the only factor. A $50 indoor camera might give you solid video in controlled lighting, while a $150 outdoor model will handle rain, snow, glare, and night vision far better. Some systems use a hub (a small box that stores video locally and routes traffic), while others rely entirely on cloud storage. Local storage is safer if your internet goes down: cloud-based is convenient and doesn’t require another device.
Indoor vs. Outdoor Wireless Cameras
Indoor cameras are compact, often designed to blend with décor, and typically lack weatherproofing. They work great for nurseries, living rooms, or home offices. Outdoor cameras are larger, rugged, and rated for rain, temperature swings, and UV exposure, usually marked IP65 or higher on the spec sheet (that number tells you the dust and water resistance level).
Outdoor models also pack better night vision because they use infrared LEDs or advanced sensors to see in darkness. If you’re mounting one near a light, choose a camera with adjustable IR sensitivity to avoid washed-out footage.
Another consideration: field of view. A narrow lens (around 90 degrees) gives you zoom-like detail on one area: a wide lens (120+ degrees) covers more ground but with smaller, harder-to-identify details. Many homeowners use one narrow camera on the front door and a wider one for the driveway. According to reviews on Tom’s Guide, popular models in 2026 balance frame rate (30 fps is standard), resolution, and weather durability.
Installation Essentials: Getting Your Cameras Up and Running
Installation is straightforward if you skip the complexity traps. Start by downloading the camera’s app and creating an account before you mount anything. This sounds boring, but it saves time when you’re standing on a ladder.
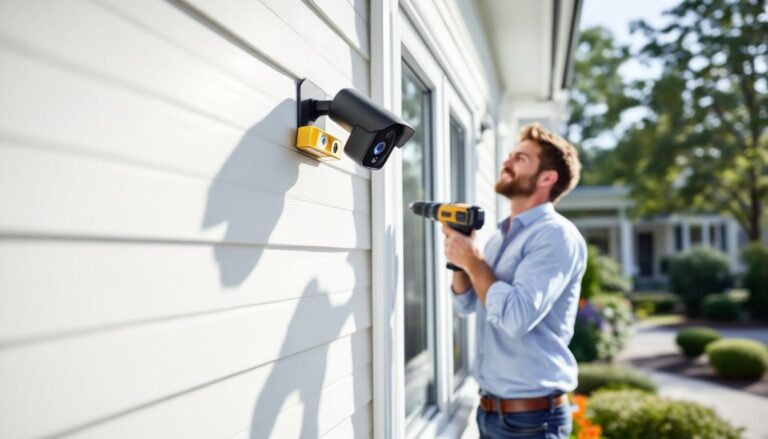
Next, scout locations for each camera. Walk around your home at dusk and dawn, when lighting is worst. Where do shadows fall? Where’s the sun glare? Mount your camera high enough that someone can’t easily swat it away or cover the lens, but low enough that you can still reach it for maintenance (typically 7–9 feet high). Avoid pointing directly into bright windows or porch lights, which will blow out the video.
For outdoor mounting, use stainless steel screws and hardware (not standard steel, which rusts). If you’re mounting on vinyl siding, use a mounting bracket that distributes weight: don’t drill directly through the siding. Brick and stucco require a drill bit rated for masonry. Make sure the camera has a clear WiFi signal, if your router is 50 feet away through two walls, the camera will drop frames or cut out entirely.
Placement Tips for Maximum Coverage
Front entry or garage door. Mount the camera 8–10 feet high, angled slightly downward. This height captures faces clearly without being easy to tamper with. Keep the lens about 15 feet from the door: closer is tempting but creates too narrow a field of view.
Driveway. Position the camera so it sees the entire approach and parked vehicles. A wide-angle lens works here. Avoid mounting directly above a motion-sensor light, which will trigger the light and wash out the camera feed when someone walks in.
Side or rear yard. Corners provide the best view of fences and property edges. Don’t hide cameras behind plants: vegetation grows and blocks the view in weeks. Instead, mount openly: visible cameras deter more effectively than hidden ones.
Indoors (bedrooms, living room, nursery). Discretion is key, but don’t sacrifice coverage. A camera in the corner of a room covers more than one pointed at a single wall. Make sure anyone who visits knows it’s there, some jurisdictions have privacy laws around recording without consent.
Securing Your Wireless System: Privacy and Network Protection
A wireless security camera is only secure if your network is. Hackers don’t care about your home security footage: they care about using your camera as an entry point to steal banking info or turn your router into a botnet.
Here are the non-negotiables:
Change the default password. Your camera comes with a generic login. Change it to something strong (16+ characters, mix of letters, numbers, symbols) and unique to this device. Store it in a password manager.
Use a dedicated WiFi network (optional but smart). If your router supports it, create a separate 5GHz band just for smart home devices. This isolates cameras from your main computers and phones.
Update firmware regularly. Most cameras auto-update, but check the app monthly. Manufacturers patch security holes constantly.
Disable cloud features you don’t use. If you don’t need the cloud backup or two-way audio, turn them off. Fewer services = fewer attack points.
Use a strong router password. If someone hacks your WiFi, they can access any camera on it. Change the default admin credentials and use WPA3 encryption if available (WPA2 if not).
Research from Digital Trends emphasizes that most home security breaches happen because of weak passwords or outdated firmware, not fancy hacking. The good news is that takes five minutes to fix.
Monitoring and Maintenance Best Practices
Once your cameras are live, resist the urge to obsess over the feeds 24/7. Instead, set smart notifications: alert on motion between certain hours, exclude pet movement if possible, and silence alerts during planned activity (like contractors being on-site).
Maintenance checklist:
Clean the lens monthly. Dust, pollen, and spider webs degrade video quality fast. Use a soft, dry cloth, never spray or wipe aggressively.
Check WiFi signal strength in the app. If you’re seeing frequent dropouts, move the router closer or add a WiFi extender near the camera. Streaming video eats bandwidth: if your internet is slow, lower the resolution or frame rate in settings.
Rename each camera clearly in your app (“Front Door,” not “Camera 1”). When something happens, you’ll be grateful for clarity.
Review footage regularly, not obsessively. Once a week, scroll through motion-triggered clips. It takes ten minutes and keeps you aware of your neighborhood’s activity.
If you have pets, you can use features like motion masking to exclude certain areas (like a pet bed or yard where the dog plays). This cuts false alerts dramatically. For homes with multiple pets, services like pet-friendly security systems balance surveillance with animal comfort.
Consider a cloud storage plan if you live in a high-crime area or want year-long backups. Local storage via a hub is free but limited: cloud plans (usually $3–10/month per camera) offer unlimited history. Some systems, like Ring Home Security, bundle multiple cameras under one subscription.
Final Thoughts: Building Your Security Layer by Layer
Wireless security cameras aren’t a silver bullet, they’re one part of a layered home security approach. Add them to good locks, exterior lighting, and solid door frames, and you’ve got a solid foundation. The best system is one you’ll actually use and maintain, not one gathering dust because it was too complicated to set up.
Start with one or two cameras in your most vulnerable spots, get comfortable with the system, and expand from there. You’ll sleep better, and potential thieves will find easier targets elsewhere.