Table of Contents
ToggleInstalling a security camera system doesn’t require a licensed electrician or a contractor’s wallet. Most homeowners can set up wired or wireless cameras in a weekend, and modern systems are far more user-friendly than they were even five years ago. Whether you’re protecting a front porch, driveway, or backyard, the right approach to planning, selection, and installation makes the difference between a system that works seamlessly and one that collects dust. This guide walks you through the essentials, from scouting locations to testing your finished setup, so you can install security cameras with confidence.
Key Takeaways
- Most homeowners can install security cameras in a weekend by carefully assessing your property’s layout, choosing strategic camera locations that avoid dead zones, and considering lighting and WiFi signal strength before purchasing.
- Select a camera system based on your budget ($150–$2,000+), coverage needs, and resolution requirements—4MP cameras are ideal for license plate identification while 1080p works for basic monitoring.
- Wired PoE systems offer superior long-term reliability and eliminate WiFi interference, while wireless systems provide flexibility for renters but require regular battery maintenance and dependence on WiFi strength.
- Proper installation requires mounting cameras on solid framing with a level, running cable safely with conduit outdoors, and configuring static IP addresses before testing video feeds from your NVR or app.
- Set up remote access and test connectivity from outside your network, then maintain your system monthly by cleaning lenses, quarterly by checking storage gaps, and annually by updating firmware and inspecting for water damage.
Assess Your Home’s Layout and Choose the Right Locations
Before you buy a single camera, walk your property and identify what you actually need to monitor. Stand at your front door, walk the perimeter, and note entry points: doors, windows, driveways, and gates. Look for sight lines, will a camera mounted at the corner see the whole driveway, or will the house shadow part of it?
Consider motion patterns. Does a visitor typically approach from the front, side, or back? Where do packages get delivered? Do you park on the street or in a driveway? These details matter because one well-placed camera beats three cameras covering dead zones.
Think about lighting conditions. A camera aimed at a sun-facing wall will wash out during afternoon glare: one facing into the sunset at dusk will struggle with backlighting. North-facing positions stay more evenly lit. If you’re placing a camera under a porch overhang, it will see less glare but also needs better low-light sensitivity.
Measure distances from your router if you’re considering wireless cameras. Most wireless systems have a reliable range of 100–150 feet in open space, but walls and interference cut that significantly. A camera 40 feet from the router through two walls may drop signal. Wired systems eliminate this problem but require running cable or conduit.
Select a Camera System That Fits Your Needs and Budget
Security camera systems range from $150 standalone units to $2,000+ multi-camera kits. Your choice depends on coverage area, storage preference, and whether you want professional monitoring or self-monitoring.
Budget considerations: a basic two-camera wireless kit runs $300–500, while a wired system with four cameras and a dedicated network video recorder (NVR) costs $600–1,200. Cloud storage subscriptions add $10–30 monthly per camera. Local storage (recording to a hard drive on your network) is a one-time cost but requires a device in your home.
Resolution matters. 1080p (2 megapixel) cameras are affordable but deliver grainy detail: 2K or 4MP cameras cost a bit more but show faces and license plates clearly. If license plate identification is your priority, 4MP is the minimum.
Look for cameras with night vision (infrared or starlight sensors) if you need visibility when it’s dark. Infrared works well for close-range (under 30 feet): starlight sensors use available ambient light and often produce color video at night, though at lower resolution.
Three external resource pages worth reviewing: Tom’s Guide discusses five key considerations for outdoor cameras, CNET offers detailed product reviews and buying advice, and Digital Trends covers smart home technology trends and connected devices.
Wired Vs. Wireless Systems
Wired systems use PoE (Power over Ethernet) cables, a single cable delivers both video signal and power. Advantages: more reliable, no WiFi interference, scalable, and generally cheaper per camera. Disadvantages: requires running cable through walls, conduit work, or along baseboards: not ideal for renters.
Wireless systems avoid cable runs and work in rental homes, but depend on WiFi strength and require regular battery swaps (for battery-powered models) or a power outlet nearby. Look for 2.4GHz and 5GHz dual-band support if available, 5GHz offers less interference but shorter range.
For most homeowners, wired systems offer the best long-term reliability, especially if you’re willing to run cable during a renovation or during exterior work.
Gather Tools and Materials Before You Begin
Prep work separates smooth installations from frustrating ones. Before you climb a ladder, have everything on hand.
Tools:
- Cordless drill with bits
- Adjustable wrench or socket set (for camera brackets)
- Stud finder (for solid mounting)
- Level (to ensure cameras aren’t tilted)
- Ladder or step stool
- Fish tape or electrician’s snake (for running cable through walls)
- Drill bit sized to your wall anchors (concrete, drywall, brick, see your camera’s specs)
Materials:
- Camera brackets and mounting hardware (supplied with camera)
- Network cable: Cat6 or Cat6A for runs longer than 100 feet: Cat5e works for shorter distances
- Power supply (for wired systems) sized per your system specs
- Network patch cables (usually 6 feet) to connect camera to NVR or switch
- Conduit or cable clips if running cable externally
- Silicone caulk to seal drill holes and protect against water intrusion
Safety gear:
- Safety glasses (always, when drilling)
- Work gloves
- Hearing protection if using a rotary hammer or impact drill
Read your system manual before beginning. Different brands have different wiring schemes, app steps, and reset procedures.
Step-By-Step Installation Process
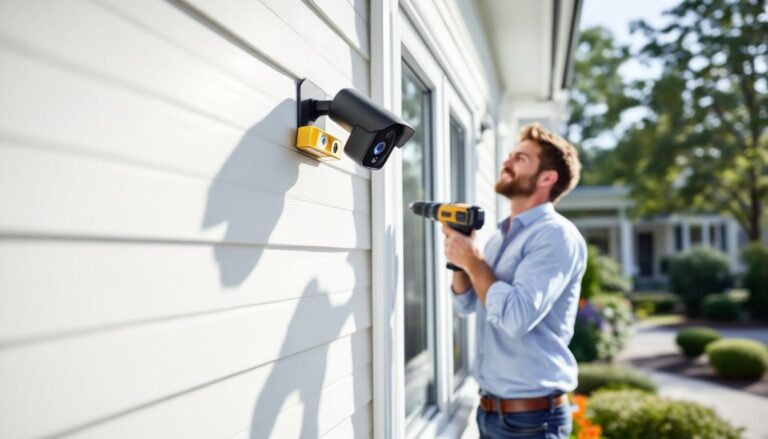
1. Mount the cameras first, before running cable.
Use your stud finder to locate studs or joists behind walls and ceilings. Fastening to solid framing (not just drywall) ensures the camera won’t sag over time. If mounting on brick or concrete, use concrete anchors rated for your camera’s weight (usually 2–5 pounds).
Hold the bracket against the wall, mark the holes, and drill. Check with a level before tightening all bolts. Even a 5-degree tilt changes what the camera sees.
2. Run cable safely.
For wired systems, run Cat6 cable from the camera location to your NVR or router. Outdoors, use conduit or exterior-rated cable to protect from UV and weather. Indoors, run cable along baseboards or through walls using a fish tape.
Never stretch cable tight or crimp it sharply, use cable clips every 18 inches. At the camera end, use weatherproof connectors and seal holes with silicone caulk to prevent water from running into your house.
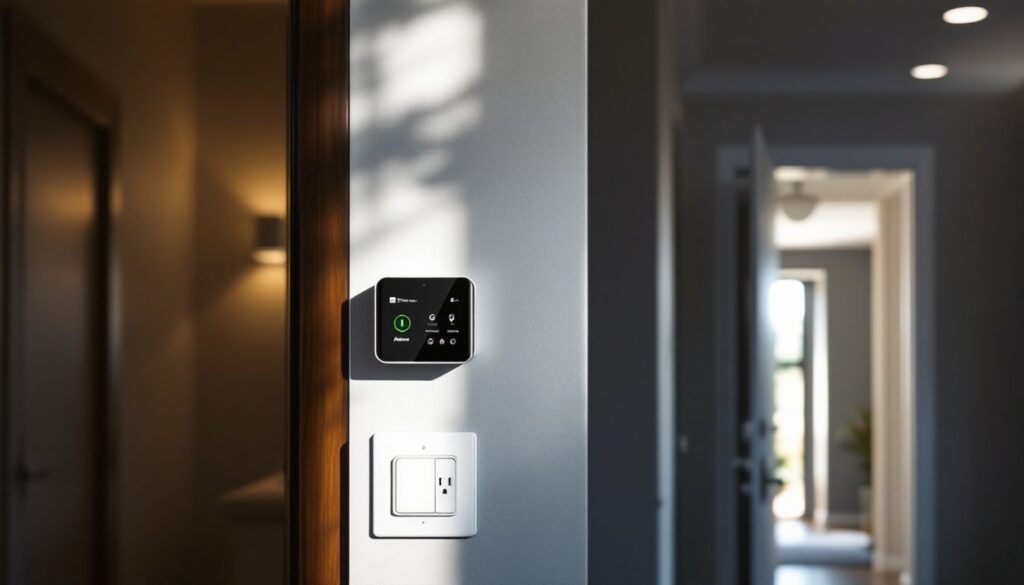
3. Connect the NVR or network switch.
Place the NVR (network video recorder) in a secure, climate-controlled location, a closet, basement, or garage works well. Ensure it’s near your router or on the same network. If your router doesn’t support the bandwidth (more than four 4MP cameras), add a managed network switch between the router and NVR.
4. Configure IP addresses and test video feed.
Connect a laptop or tablet directly to the NVR using an HDMI cable or network access via the camera app. Log in (default credentials are in the manual: change them immediately). Assign static IP addresses to cameras so they don’t get reassigned when your router reboots.
Walk in front of each camera and verify video is clean and clear on the monitor. Adjust camera angles if sight lines aren’t right.
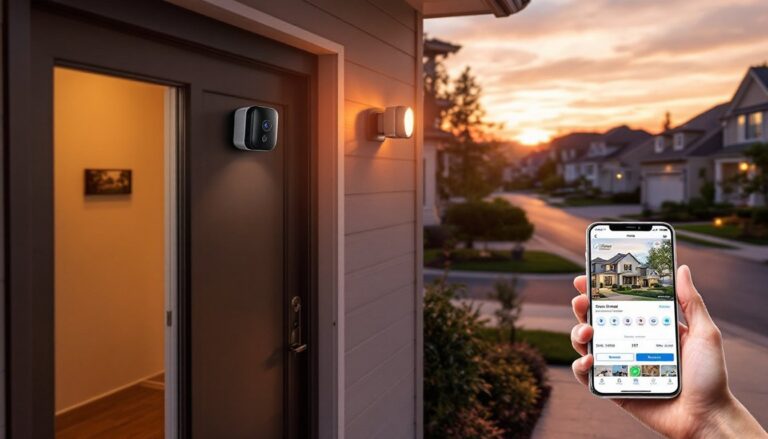
5. Set up remote access (wireless systems or app-based wired systems).
Create an account in the camera manufacturer’s app, add your system, and test accessing it from your phone on a different network (outside your house). This confirms your system is reachable and secure.
Set Up Your Monitoring System and Test Connectivity
A camera that records locally but you can’t access is half useful. After physical installation, spend time on the software side.
Configure storage settings. Most NVRs offer local recording (to an internal or external hard drive) or cloud backup. Local recording is cheaper long-term but requires a device in your home: cloud storage is convenient but costs monthly and can be slower if your internet is congested.
Set recording schedules: continuous, motion-triggered, or a mix. Motion-triggered recording saves storage space but might miss activity in shadows or low light.
Test remote access thoroughly. Log out of the app, leave your home network, and reconnect. Verify you can view live footage and playback recordings. A system that works at home but fails remotely is useless if you’re traveling.
Check for WiFi dead zones (for wireless cameras). Walk around your property with your phone and open the camera app. If a camera’s signal drops below three bars, consider relocating it or adding a WiFi extender.
Document your setup. Write down IP addresses, login credentials (in a secure password manager, not a sticky note), and camera locations. Future you will thank you when troubleshooting or upgrading.
Maintain Your System for Long-Term Performance
A security camera system isn’t install-and-forget. Regular maintenance prevents failures when you need it most.
Monthly: Check each camera’s lens for dirt, spider webs, and debris. A soft cloth or canned air cleans glass without scratching. Verify motion detection is triggering correctly by walking past cameras during the day.
Quarterly: Review recorded footage for gaps (a sign the recorder crashed or storage filled up). Check that your NVR’s hard drive has free space: most systems overwrite old footage automatically, but a full drive stops recording.
Annually: Update camera firmware when the manufacturer releases security patches. Verify your router password and WiFi encryption are strong (use WPA3 if available). Inspect outdoor cameras for water ingress around cable entry points: reapply silicone caulk if gaps appear.
If a camera goes offline: First, restart the NVR and check WiFi signal. If the camera uses PoE, verify the cable hasn’t been damaged. If it’s wireless and battery-powered, replace the battery. If the camera still won’t connect, reset it (usually a 10-second button press) and rejoin it to your network.
Most DIY systems last 5–7 years before storage devices or cameras degrade. Budget for replacements and keep your original manual for troubleshooting. Your installed system is an asset: small maintenance keeps it working when it counts.