Table of Contents
ToggleA security camera is only as effective as the accessories supporting it. Whether you’re installing your first system or upgrading existing cameras, the right mounting hardware, power solutions, weatherproofing, and monitoring tools make the difference between a half-functional setup and a professional-grade security network. This guide walks homeowners and DIY enthusiasts through selecting, installing, and optimizing the essential security camera accessories that transform basic cameras into reliable home monitoring solutions. From brackets and cables to smart integration platforms, you’ll learn what works, why it matters, and how to avoid common installation mistakes.
Key Takeaways
- Security camera accessories like mounting brackets, power supplies, and weatherproofing are essential to transform basic cameras into a reliable and professional-grade home monitoring system.
- Proper power delivery requires matching your camera’s amperage rating plus 20% headroom, and using UV-rated outdoor cables with thicker gauge wire (10 AWG) for runs exceeding 100 feet to prevent voltage sag.
- Quality mounting hardware (stainless steel or finished aluminum) and secure installation with a level prevents view drift and ensures long-term durability in various climates.
- Weatherproofing accessories including polycarbonate dome covers, 100% silicone sealant, and thermal management solutions extend camera lifespan well beyond typical manufacturer expectations.
- Smart integration tools like PoE switches, NVR storage units, and mobile apps with instant alerts convert passive recording into an active home security deterrent with actionable insights.
Essential Security Camera Accessories Every Homeowner Needs
The foundation of any security setup rests on reliable hardware. Without proper mounting, power delivery, and cable management, even premium cameras underperform. These core accessories prevent common issues: loose mounts causing view drift, power failures during critical moments, and cable damage from weather and rodents.
Mounting Brackets and Hardware
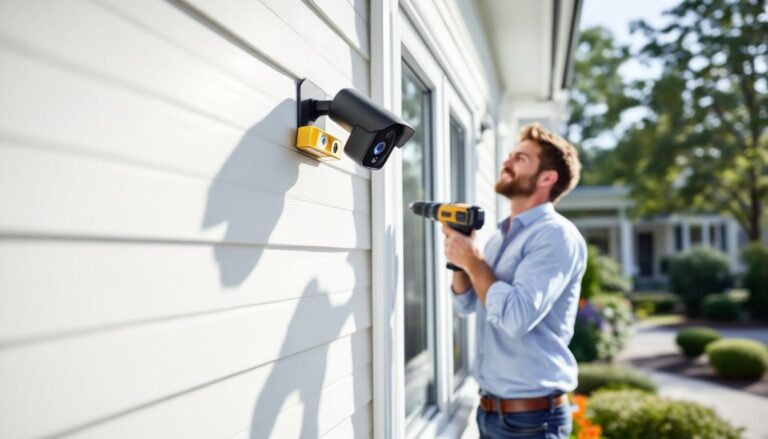
Camera placement determines what your system actually sees. Mounting brackets come in three main types: wall mounts for flat surfaces, corner mounts for edges and overhangs, and pole mounts for open areas. Each uses different fastening methods suited to the mounting surface.
Wall mounts typically use lag bolts or expansion anchors into studs or solid masonry. For drywall without studs, toggle bolts rated for at least 50 pounds are essential, cheap plastic anchors fail within months. Measure twice and use a level during installation: even slight tilts skew the camera’s field of view over time.
Corner mounts grip the junction where two walls meet, ideal for monitoring entries or blind spots. These require less fastening hardware but depend on precise corner geometry, rounded corners common in modern homes may need shim adjustment.
Pole mounts use U-bolts to wrap around posts, trees, or fence uprights. Tighten bolts evenly to avoid twisting: uneven pressure bends soft aluminum poles. Expect to re-tighten seasonal shifts in temperature and wood movement.
Material matters. Stainless steel brackets resist rust and salt corrosion near coastal areas. Aluminum is lighter but needs clear finish to prevent oxidation. Cheap zinc-plated brackets oxidize within a year in humid climates, leaving permanent staining on siding.
Power Supplies and Cable Solutions
Security cameras demand consistent power. Most modern systems use either 12V DC (direct current via transformer) or PoE (Power over Ethernet), which delivers power and data through a single cable, the cleaner option if your network infrastructure supports it.
Power supply sizing is straightforward: match the camera’s rated amperage (listed in specs), then add 20 percent headroom. A camera drawing 1 amp needs a 1.2-amp minimum supply. Undersized supplies cause voltage sag, which degrades image quality and triggers false night-vision mode during day hours.
Cable runs over 100 feet suffer voltage drop. Use thicker gauge wire (10 AWG instead of 14 AWG) for long runs, or step up to PoE, which handles extended distances better. Outdoor cables must be UV-rated and UV-resistant jacket: standard network cables degrade within one season in sunlight.
Cable management prevents damage and troubleshooting headaches. Run cables through conduit where they cross exposed areas, under eaves, or near potential traffic. Split-loom tubing protects against rodent chewing, a surprisingly common failure point. Secure cables every 18–24 inches with corrosion-resistant clips or zip ties to prevent sagging and strain on connection points.
Weatherproof junction boxes shelter cable connections from rain and insects. Sealant and gaskets are cheap insurance: skip them and moisture creep causes corroded connections and intermittent failures within months.
Weatherproofing and Protective Equipment
Cameras face sun, rain, wind, dust, and temperature swings. Proper weatherproofing extends lifespan and maintains image clarity.
Clear dome covers protect lens from rain and dust while maintaining optical clarity. Polycarbonate domes outperform acrylic: acrylics yellow and cloud within two years in direct sun. Replacement domes run $20–$40 each, making initial investment worthwhile. Clean domes quarterly: dust buildup degrades night vision IR performance noticeably.
Silicone sealant (100% silicone, not paintable caulk) seals gaps around brackets and cable entries. Paintable caulk cracks in freeze-thaw cycles and degrades in UV. Avoid silicone-based products on vinyl or rubber gaskets: they cause degradation. Apply sealant after installation, not before, to avoid trapping moisture.
Sunshields and visors reduce glare during low-angle sun hours (early morning, late afternoon), which washes out image detail and confuses auto-focus. Metal or dark-tinted shields do double duty: cooling the camera body in hot climates and protecting the lens from rain angles.
Thermal considerations matter more than most DIYers realize. Cameras in direct sun can reach 140–160°F: specs typically list a safe operating range of –4°F to 122°F. In extreme climates, passive cooling (via vents or thermal paste between camera and mount) prevents shutdowns. Some units auto-throttle or stop recording when overheating, a protection feature that means lost footage during peak risk hours.
Recent smart home technology news and home automation reviews highlight how advanced weatherproofing extends device lifespan beyond typical five-year manufacturer expectations.
Enhancing Camera Performance and Coverage
Beyond the basics, accessories amplify what your cameras see and how intelligently they record.
Lens attachments and filters expand capabilities. Macro lenses close the focal distance for detail on packages or faces: wide-angle adapters increase field of view from 90° to 130°+, trading resolution for coverage. Polarizing filters cut reflected glare from water or glass, and IR-pass filters improve night vision in certain conditions. Most are affordable ($15–$50) but verify compatibility with your camera model before buying.
Light-based accessories address dim areas. Infrared illuminators boost night vision range: passive reflectors on buildings or posts magnify existing light without power. Active white-light spotlights (small LED units) deter motion or alert residents but consume noticeable power if running 24/7.
Dual-camera mounts allow wide-angle and zoomed views of the same area from a single pole, eliminating blind spots within a sight line. These save mounting hardware and reduce roof penetrations.
Motion sensors and ancillary switches pair with cameras for smarter activation. A basic PIR (passive infrared) sensor can trigger recording only on motion, reducing file storage and bandwidth demands by 70–90 percent. Hardwired sensors outlast battery units: integrate them during initial wiring if possible.
Product reviews like the Ring Indoor Cam Plus show how quality accessories transform functionality, better mounting angles, proper power delivery, and protective covers compound into measurable improvements in usability and reliability.
Smart Integration and Monitoring Tools
Modern security isn’t just about recording: it’s about making footage accessible and actionable.
Network switches and PoE injectors are the backbone of multi-camera systems. An unmanaged 8-port PoE switch ($40–$80) centralizes power and data for up to eight cameras, reducing clutter and simplifying troubleshooting. Managed switches (more expensive) add features like redundant uplinks or VLAN support for larger installations. Match switch capacity to your system: a 60-watt supply struggles with three power-hungry cameras.
Storage solutions determine how long footage persists. NVR (Network Video Recorder) units store locally and run independently of internet connectivity, critical for reliable playback if your ISP fails. Capacity ranges from 1TB to 16TB: a 4TB drive typical holds 30–60 days of four-camera 1080p recording, depending on motion activity. Budget $200–$600 for a decent standalone NVR plus drives.
Cloud backup adds redundancy. It’s not a replacement for local storage (internet outages are common) but ensures footage survives theft or hardware failure. Most platforms charge $5–$15 per camera monthly: annual plans offer 20–30 percent discounts.
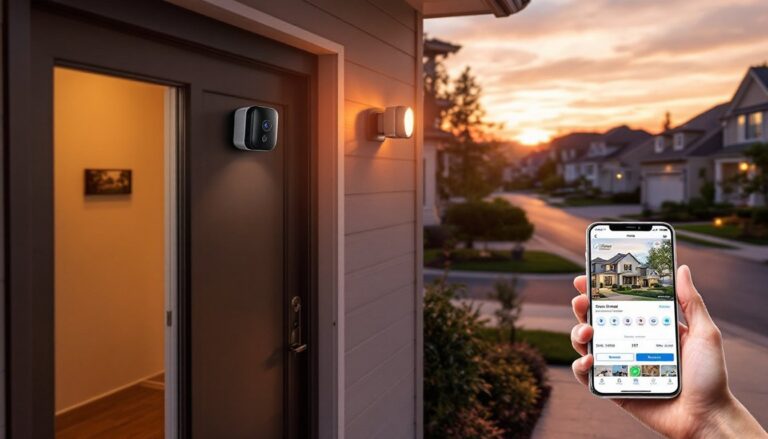
Mobile apps and notifications transform cameras from passive recorders to active deterrents. Quality apps deliver instant alerts, two-way audio, and live-view without lag. Free apps often have 10–30 second delays and limited playback options: paid tier upgrades ($10–$20/month) eliminate most delays and unlock advanced features like person vs. vehicle detection.
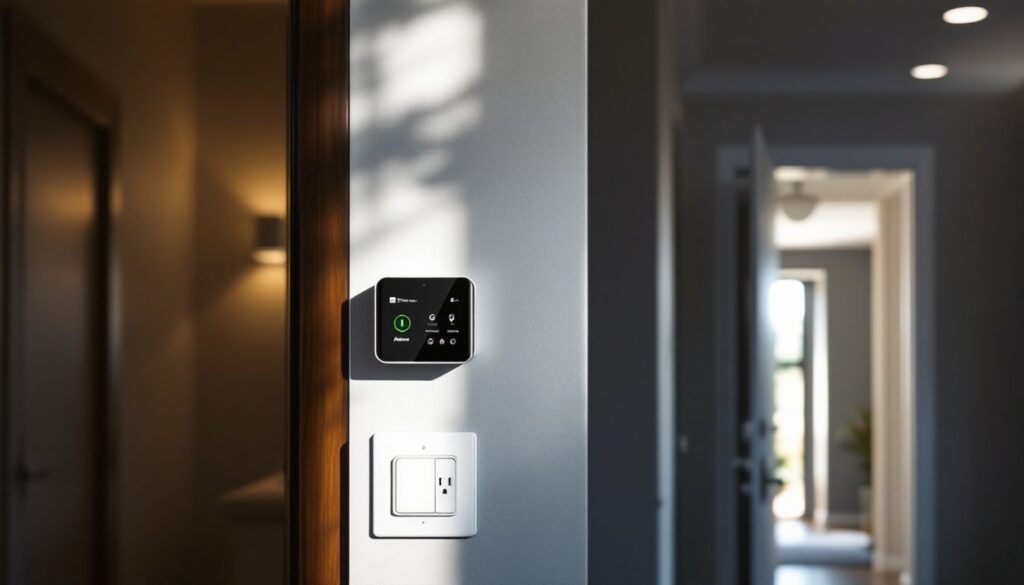
Integration hubs (like smart home controllers) connect cameras to broader automations. Set scenes: motion triggers lights, camera zooms, and alarms simultaneously. These platforms cost $50–$200 upfront but reduce per-accessory costs if you’re already in an ecosystem.
Technology reviewers at CNET explore smart home setups showing real-world integration challenges and workarounds, useful context before committing to a specific platform.
Conclusion
Security camera accessories aren’t afterthoughts, they’re as critical as the cameras themselves. Proper mounting, robust power delivery, weatherproofing, and smart integration transform a basic system into reliable home monitoring. Start with the essentials: quality brackets, correct power specs, and durable cabling. Layer on weatherproofing and performance enhancements based on your climate and coverage gaps. Finally, invest in storage and monitoring tools that fit your workflow. Done methodically, a well-accessorized security setup runs for years with minimal maintenance and delivers genuine peace of mind.